
By Chris Pont
I’ve been a developer now (in some form) for nearly 20 years. Source control for some of the first products that I’d worked on involved CTRL-C, CTRL-V (seriously!). Deployment – ditto. Things have changed significantly over that time – product timelines have shortened, bugs need to be fixed in record time and proof of concepts need to be up and running in weeks.
Something that is becoming increasingly important to allow some level of control over these shortening timescales is an easy to use ALM tool (Application Lifecycle Management Tool). Defining what ALM encompasses can be difficult, but essentially it covers some form of governance, development and operations within a software development project. Many good ALM tools allow you to:
- Create work items for developers to work on
- Plan releases
- Track the progress of work by developers
- Facilitate code reviews by developers
- Perform continuous integration builds on code check-in
- Track test coverage
- Perform automated testing
- Deploy code to various environments
- Track issues for the application in production.
There are many tools on the market that will cover some, or all of the above such as JIRA, Jenkins, Huddle, Flow etc. I’m going to look at Microsoft Visual Studio Online (curious naming as it’s really Team Foundation Server Online) since it allows us to try much of the functionality for FREE (up to 5 users with 60 mins hosted build per month). You can even download Visual Studio Community to allow you to write and check in code for free (restrictions apply on organisational use).
Signing Up
To sign up for Visual Studio Online (or VSO), go to www.visualstudio.com and click the sign-up button. You’ll need to decide on a domain prefix for the URL in the form of http://.visualstudio.com. This will allow you web access to view work items, build progress etc. as well as giving you an endpoint for Visual Studio to connect to.

Creating A Team Project
We’ll need to create a team project for our demo. A team project is a collection of work items, team members, code and tests that forms some related work. The team project is where we’ll be checking in our code.
Give the team project a name and optionally a description. The process template will define how work items, bugs, work item types, queries and reports are structured. For the demo we’re fine to leave this as SCRUM. Version control can be either Team Foundation Version Control (TFVC) or Git. This depends how you’d like to work and if you have distributed teams.
Git is a distributed source control system where each cloned project becomes its own source control repository. TFVC however (depending on how your workspace is configured) requires server connectivity for most operations. We’ll leave this as Team Foundation Version Control for the demo.

When you click Create Project, VSO will create your project including a source control repository, some built in queries and reports.
Connecting Visual Studio and Checking in Some Code
Make sure you have a copy of Visual Studio 2013 running on your machine. After creating your new team project, VSO should prompt you to Navigate to Project. Click that, and you’ll see the new dashboard for your project. Here you’ll be able to track the status of development, if you’re running SCRUM you’ll see a burn-down chart, number of work items etc. You can also add your own widgets and charts based on queries (which are extremely easy to create).
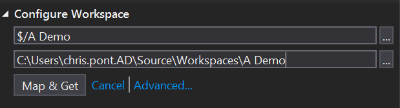
You’ll see an item at the bottom of the dashboard – Open in Visual Studio. Click that and your team project will be opened in Visual Studio. You’ll need to configure your workspace to map source code to your local disk (which should prompt you in the side bar)
Once your team project is mapped, create a new solution. In the side bar, you should have solutions listed (which currently will be empty). Click new to create a new solution and create a new ASP.NET Web Application.
Create a basic ASP.NET MVC project and no authentication. Click “Pending Changes” and you’ll see the new solution (and it’s many files) listed. Add a check-in comment (I believe the customary first comment is “Initial Check-in”) and click Check-in.
Congratulations, your code is now checked in to VSO. That wasn’t so hard was it?
Creating an Azure Website
Head to http://azure.microsoft.com/ and sign up for an account. In the UK you’ll get £125 of Azure credit to use but you will need a credit card to sign up for the trial (this is for identification purposes and if you exceed your free credit the services will simply stop. You won’t be charged)
Once you’re signed up log into to the management portal and create a website. Click the plus symbol at the bottom, click compute > website > quick create and think of a domain prefix for the website. Click create website and the site should appear in you websites list in the azure portal. Easy!
Setting up Continuous Deploy
Click on the newly created website and you’ll see an option for deployment from source control.
Using this option you can configure deployments from various different sources. Select Visual Studio Online.
Log in to VSO and select the team project you created earlier. VSO and Azure will now link the project and create a build template which is configured to deploy to Azure every time code is checked in.
Triggering a Build!
To kick things off, simply make a small change to your project, go to “Pending Changes”, type a commit comment and click “Check In”. As part of the TFS hosted build your website should be deployed to Azure.
Conclusion
Getting the basic components in place and talking to each other is fairly easy. Of course you can host your source code in VSO and host your own build controller and deploy to anywhere you need (assuming you have access using something such as web deploy) or even use hosted or on-site Release Management – a new tool that Microsoft acquired to make controlling, managing and auditing your deployments across multiple environments possible. There’s also the ability to include running MSTest, NUnit, xUnit tests as part of the build (failing the build if desired), running automated (CodedUI) tests, code analysis (to check that developer code meets certain standards) and much more. In fact, anything that you can plug into windows workflow could potentially be used.
Note: Some of the above is obviously not included in the free version of Visual Studio Online since you would be hosting a build controller yourself and integrating with VSO.
ALM tools are becoming an increasingly important part of software development and the tools available are becoming more and more feature rich in helping developers and stakeholders achieve more whilst maintaining control in increasingly shortened timescales.
About the author
IJYI Ltd
IJYI Ltd.